I’ve been interested in photometry for quite a long time, starting in the early 2000s when I bought a photometric V (visual spectrum) filter paired with a monochrome camera to take images of variable stars and use differential photometry techniques to estimate the brightness of the variable. However after the kids arrived I ended up selling off my gear and putting the observatory in mothballs until 2019 when the kids were old enough to not want Mom and Dad around and we could being to indulge in hobbies again! However I did spend some time continuing to dabble in photometry using iTelescopes, notably taking a lot of images of the star AG DRA which went into outburst while I was watching – very cool!
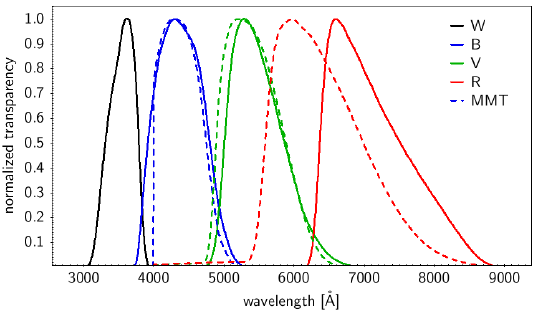
Photometry is the science of determining brightness of stars using a series of standardized filters of varying bandpasses: U (Ultra violet) B (Blue) V (Visual or yellow-green) R (Red) I (Infrared) are the bands that became standard between 1990 and 2000. By taking pictures of stars through a series of these filters, the true color of the star (notably it’s B–V colour index, which is a good indication of the temperature of a star. In conjunction with the spectral type, it can also be used to measure interstellar absorption.) The big problem for citizen scientists for photometry is the cost of these filters, generally $200-400 each. So despite the fact we have relatively cheap monochrome CMOS and CCD cameras and filter wheels, filters are a big obstacle to overcome. However, there are alternatives.
One possible alternative is the use of OSC (one shot color) and DSLR (digital single lens reflex cameras) which essentially are monochrome sensors with Bayer matrices in front of the pixels which provide RGB (in fact most cameras have 4 segment RGGB matrices).
While I had used DSLRs for a lot of my astroimaging, I’ve decided to move to OSC cameras for EAA (electronically assisted visual astronomy) and monochrome cameras for astrophotography, spectroscopy, and photometry. I find astrocameras to be way less cumbersome and cranky to deal with than DSLRs, since I never look through a viewfinder. My current camera is a ZWO ASI183M with a 1” Sony IMX183 sensor with a 5496×3672 pixel resolution and a 2.4u pixel size along with a ZWO 5 position USB filter wheel. All images are captured with my 10” F/4.7 newt on an NEQ6 mount.
With telescopes becoming more and more automated and particularly with the advent of easily used plate solving to ensure my telescope was actually pointing at the right star (a big problem during my first go round in Photometry!) my interest in doing photometry was rekindled, but the cost of filters has kept me using iTelescopes (most of which are equipped with UBVRI filters). However, an intriguing article from the British Astronomical Association caught my eye – “Low-cost BVRI Filters for CMOS/CCD Photometry” by Tex Moon (https://britastro.org/vss/low_cost_BVRI_filters.pdf). Tex also found the cost of photometric filters to be too high for the average citizen scientist and set up to test regular Wratten planetary imaging filters for use in photometry. His results were good enough that I wanted to do the same thing, starting with the important B and V filters.
Based on Tex’s comments that GSO planetary filters seem to have good transmission characteristics that match his results, I set out to find some rebranded GSO filters on Amazon. The Astromania filters I discovered appear to be GSO filters so I picked up a Wratten #56 Green and #12 Yellow (for a V filter) and a Wratten #38 Blue filter with a SVBONY IR UV cut filter (for a B filter). Each of these filters was approximately $25 so for $100 I got the equivalent of $800 worth of photometric filters. Assuming they work!

One issue is eliminating the need to swap filters in my ZWO electronic filter wheel to do science imaging versus regular astrophotography. However, since V filter seems to be fairly close to green and B filters seem fairly close to blue, was it possible to just replace my standard blue and green filters with my DIY photometric filter? This would mean my 5-slot filter wheel would be normal red, V for green, B for blue, normal luminance, and my Star Analyzer 100 grating for spectroscopy. No swaps needed!
The only issue with mounting the DIY V and B filters in my filter wheel was physical size – a pair of filters screwed together are too long to fit. Following the advice in the BAA article I decided to unmount one of the filters and added it to the second filter housing, which of course meant I needed to disassemble the filter. Each filter has a pair of tiny slots in a threaded ring that threads into the filter housing to secure the filter, so back to Amazon for the correct tool to disassemble filters. A $22 tool purchase later I was in business.

Spanner tool used for Optical Work
While it was suggested that there would be interference patterns produced by having both filters in direct contact (Google Newton’s Rings for more on this) I didn’t observe this – probably because the filters aren’t nearly flat enough optically to be in direct contact. If it turns out to be an issue I can put a thin gasket around the filter but so far so good.
The next step is testing the resulting B and V filters on AAVSO (American Association of Variable Star Observers) standard star fields, a list of which is available at:
https://app.aavso.org/vsd/stdfields
In the BAA article Tex did some analysis on his filters using the NGC 3532 cluster that we never see above the horizon here, so I will need to choose some observable stars (e.g. M67) from the list and take measurements of the stars to ensure that the transformation between the standard BV filters and my DIY versions.

To do this images of the star fields are taken and magnitudes measured against the standard magnitudes to calculate the difference between the standard and the observer values, which provides a transformation coefficient for each filter and ensures this coefficient is linear across different magnitudes of stars. More on this next time!
Thanks for the article. Good summary of Tex’s paper, which is a bit hard to get through and not easy to understand. I’m also sitting here with a box of planetary filters trying to figure out how to do photometry. It’s a good challenge.